The Google Cloud Platform integration allows you to ingest metrics directly from GCP. In addition to setting up and managing the GCP integration through the UI, you can also use the REST API for setting up and managing the GCP integration. This doc page provides some basic steps and examples on how to do this.
In these examples, you access the REST API through the interface, so that you don’t need to provide the Bearer token.
Before You Start
When you set up a Google Cloud Platform integration, you have to give the VMware Aria Operations for Applications service permissions to access the data you want to visualize and analyze.
For information, see Google Cloud Platform Overview and Permissions.
Create a GCP Service Account Retrieve a GCP JSON Key
- Navigate to your GCP dashboard page.
- Click IAM & Admin.
- Select Service Accounts, and click the Create Service Account button on top.
- On the Service account details page, enter a service account name.
For example,
my-integration. - Click the Create and Continue button.
- On the Grant this service account access to project page, in the Select a role drop-down menu, scroll down and select Project > Viewer to give read access.
- Click the Continue button and on the next page click Done. created in Step 2, and click it.
- On the Service accounts page, click the name of the service account that you just created. In this example, click my-integration.
- Click the Keys tab and from the Add Key drop-down menu, select Create new key.
- Select JSON as the Key type and click Create.
- Save the private key as a
.jsonfile and open it.
Set Up a GCP Integration
You can add a GCP integration by using the REST API documentation UI.
- Log in to your product cluster.
- Click the gear icon in the top right and select API Documentation.
- Expand the Cloud Integration category.
- To create a new cloud integration, click the
POST /api/v2/cloudintegrationrequest. -
To add an integration, in the Edit Value text box enter the following example.
   {
     "name": "integration-name",
     "service": "GCP",
     "gcp": {
       "metricFilterRegex": "",
       "gcpJsonKey": "private_key",
       "projectId": "project_id",
       "categoriesToFetch": [],
       "customMetricPrefix": [],
       "disableHistogram": false,
       "disableHistogramToMetricConversion": true,
       "histogramGroupingFunction": [],
       "disableDeltaCounts": true
     },
     "serviceRefreshRateInMins": 5
   }
In this example, replace
private_keywith the value of theprivate keyfrom the JSON file andproject_idwith the value of theproject_idin your JSON file. - Click Execute.
Update a GCP Integration
You can update a GCP integration through the API.
In this example, we update an existing GCP integration to retrieve the metrics only for the following list of categories:
- Apigee
- App Engine
- Cloud Functions
- Cloud Run
We also change the service refresh rate from 5 to 10 minutes.
- In the REST API documentation UI, click the
GET/api/v2/cloudintegrationrequest. -
Click Execute.
In the Response Body section, you can see the list of all configured cloud services integrations. For example, for a GCP integration you see:
   {
     "forceSave": false,
     "name": "integration-name",
     "id": "aaaaaaaa-bbbb-cccc-dddd-eeeeeeee",
     "service": "GCP",
     "disabled": false,
     "inTrash": false,
     "creatorId": "user-account-email-address",
     "updaterId": "user-account-email-address",
     "lastReceivedDataPointMs": 1690204240391,
     "gcp": {
       "projectId": "my-project-id",
       "gcpJsonKey": "{\"project_id\": \"my-project-id\"}",
       "disableHistogramToMetricConversion": true,
       "disableDeltaCounts": true,
       "categoriesToFetch": [],
       "customMetricPrefix": [],
       "disableHistogram": false,
       "histogramGroupingFunction": [],
       "metricFilterRegex": ""
     },
     "lastProcessorId": "c09797d7-f2c9-4253-8fcb-77fbad50a97c",
     "lastProcessingTimestamp": 1690204240721,
     "createdEpochMillis": 1690204240387,
     "updatedEpochMillis": 1690204240387,
     "serviceRefreshRateInMins": 5,
     "deleted": false
   }
In this example, you can see that there are no categories listed under
"categoriesToFetch"and the service refresh rate is 5 minutes. - Copy the value of the
"id"parameter of the integration that you want to update. - Copy the content of the response in a text file.
-
Edit the copied response body.
-
To update the list of services, under
"categoriesToFetch", add Apigee, App Engine, Cloud Functions, and Cloud Run: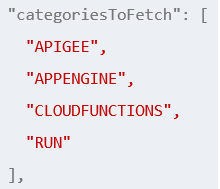 Note: The values that we pass as
categoriesToFetchare not the same as the ones displayed in the Operations for Applications UI. -
To change the service refresh rate to 10 minutes, update the
"serviceRefreshRateInMins"value:
The updated response body will look like that:
   {
     "name": "integration-name",
     "service": "GCP",
     "gcp": {
       "metricFilterRegex": "",
       "gcpJsonKey": "{\"project_id\": \"my_project_id\"}",
       "categoriesToFetch": [
         "APIGEE",
         "APPENGINE",
         "CLOUDFUNCTIONS",
         "RUN"
       ],
       "customMetricPrefix": [],
       "disableHistogram": false,
       "disableHistogramToMetricConversion": true,
       "histogramGroupingFunction": [],
       "disableDeltaCounts": true,
       "projectId": "project_id"
     },
     "serviceRefreshRateInMins": "10"
   }
Note: The values that we pass ascategoriesToFetchare not the same as the ones displayed in the Operations for Applications UI. -
- In the REST API documentation UI, click the
PUT /api/v2/cloudintegration/{id}request. - Under Parameters, in the id text box enter the ID of the integration that you want to update.
- In Edit Value text box enter the edited response body with the updated categories to fetch and the new service refresh rate.
- Click Execute.
- Verify that the response returns
200status code to indicate that the update was successful.
Enable and Disable a GCP Integration
VMware Aria Operations for Applications automatically disables integrations that are experiencing errors due to invalid credentials. To enable an integration after the credential has been corrected or to manually disable an integration, you need the integration ID.
- In the REST API documentation UI, click the
GET/api/v2/cloudintegrationrequest. -
Click Execute.
In the Response Body section, you can see the list of all configured cloud services integrations. For example, for a GCP integration you see:
{ "forceSave": false, "name": "integration-name", "id": "aaaaaaaa-bbbb-cccc-dddd-eeeeeeee", "service": "GCP", "disabled": false, "inTrash": false, "creatorId": "user-account-email-address", "updaterId": "user-account-email-address", "lastReceivedDataPointMs": 1690204240391, "gcp": { "projectId": "my-project-id", "gcpJsonKey": "{\"project_id\": \"my-project-id\"}", "disableHistogramToMetricConversion": true, "disableDeltaCounts": true, "categoriesToFetch": [ "APIGEE", "APPENGINE", "CLOUDFUNCTIONS", "RUN" ], "customMetricPrefix": [], "disableHistogram": false, "histogramGroupingFunction": [], "metricFilterRegex": "" }, "lastProcessorId": "c09797d7-f2c9-4253-8fcb-77fbad50a97c", "lastProcessingTimestamp": 1690204240721, "createdEpochMillis": 1690204240387, "updatedEpochMillis": 1690204240387, "serviceRefreshRateInMins": 10, "deleted": false } - Copy the value of the
"id"parameter of the cloud integration that you want to enable or disable. - To enable the integration, run the
POST /api/v2/cloudintegration/{id}/enablerequest with the ID of the integration that you want to enable. - To disable the integration, run the
POST /api/v2/cloudintegration/{id}/disablerequest with the ID of the integration that you want to disable.
Delete and Recover a Deleted GCP Integration
To delete a cloud service integration that you no longer want to use, you need the integration ID. If you decide to move the integration to the recycle bin, you can recover it at a later stage.
- In the REST API documentation UI, click the
GET/api/v2/cloudintegrationrequest. -
Click Execute.
In the Response Body section, you can see the list of all configured cloud services integrations. For example, for a GCP integration you see:
{ "forceSave": false, "name": "integration-name", "id": "aaaaaaaa-bbbb-cccc-dddd-eeeeeeee", "service": "GCP", "disabled": false, "inTrash": false, "creatorId": "user-account-email-address", "updaterId": "user-account-email-address", "lastReceivedDataPointMs": 1690204240391, "gcp": { "projectId": "my-project-id", "gcpJsonKey": "{\"project_id\": \"my-project-id\"}", "disableHistogramToMetricConversion": true, "disableDeltaCounts": true, "categoriesToFetch": [ "APIGEE", "APPENGINE", "CLOUDFUNCTIONS", "RUN" ], "customMetricPrefix": [], "disableHistogram": false, "histogramGroupingFunction": [], "metricFilterRegex": "" }, "lastProcessorId": "c09797d7-f2c9-4253-8fcb-77fbad50a97c", "lastProcessingTimestamp": 1690204240721, "createdEpochMillis": 1690204240387, "updatedEpochMillis": 1690204240387, "serviceRefreshRateInMins": 10, "deleted": false } - Copy the value of the
"id"parameter of the integration that you want to delete. - To delete the integration, click the
DELETE /api/v2/cloudintegration/{id}request.- Under Parameters, in the id text box enter the ID of the integration that you want to delete.
-
From the skipTrash drop-down menu select whether you want to keep the deleted integration in the recycle bin.
- Select false, to move the integration to the recycle bin, so that you can recover it at a later stage.
- Select true, to delete the integration forever. You won’t be able to recover it.
- Click Execute.
- To recover an integration from the recycle bin, i.e., an integration that was not permanently deleted, in the REST API documentation UI, click the
POST /api/v2/cloudintegration/{id}/undeleterequest.- Under Parameters, in the id text box enter the ID of the integration that you want to recover.
- Click Execute.